Tuesday, October 19, 2010

tips of haircolor


Introduction:

Most unwanted hair color disasters are often due to the lack of understanding about the basic hair coloring "laws" and how they apply to coloring hair.

This article (which is a classic and the very first of its kind on the Web since 2000) is not meant to be a thorough education in hair coloring, but a first step in helping home users of hair color to understand the basics.

I will try not to get too technical, so follow along carefully and re-read any area that you are not sure about until you understand it thoroughly.

Warning: This information is presented for your own judgment of suitability and use at the user's risk. No liability is assumed whatsoever by the author of this article or by HairBoutique.com.

First Rule Of Color - Hair Color Is Not Hair Paint:


Color, as we perceive it, is actually the reflection of light off of the colored pigments in the hair shaft. This "reflection of light" is what we see as "color".

The shade of color is made up of the different combinations of reflections of light off of the colored pigments.

This is why hair color appears different under fluorescent lights than in natural sunlight - whether it is color from nature or from a bottle.

Levels: What They Are And How They Impact Hair Color

Levels are the degree of "lightness or darkness" of a color that is "reflected or seen" by the eye. Hair color is assigned a Level 'number' from1 to 10 with 1 being black and 10 lightest blonde.


In other words, black reflects very little light and lightest blonde reflects the greatest amount of light. A level 10 blonde would be 'two steps lighter' than a level 8 blonde. This system of levels applies to all colors and almost all brands commonly found.

Different Types of Hair Color:

There are several different types of hair color. Be sure to read this section carefully.

Permanent Haircolor:

Permanent is just what it means. This makes a 'permanent' change in the pigment of the hair shaft. It does not wash out!

It will fade in time, but cannot be simply removed to "bring back" your natural color. All hair that has been colored in this way has the natural color pigments irreversibly chemically altered.

It can be removed, leaving the "altered" hair shaft pigments, which can be "corrective colored" back close to the original color.

This is a job which should be left to the Pros Only! It can be one visit or many visits to the salon to try to correct a bad color job, it is expensive and is hard on the hair to varying degrees.

Single Process Color:

Single Process Color Is The Only Permanent Color That Should Be Attempted By The Amateur!Single process means that the color is lifted and deposited in one step.

Semi-Permanent:

Semi-Permanent color is what it says it is, it can cover gray and go darker, but can not lighten. It lasts varying lengths of time depending on the product. Suitable for amateur colorists.

Warning: Double Process (bleaching and toning to the desired color) should never be attempted by a home hair colorist!. This is definitely a pro-only process.

Deposit Only Color:

Deposit Only color can only "deposit" color into the hair, there are many varieties on the market for the home user. These are very "User Friendly'' and usually condition and color in one step.

The very popular color "glazes or translucent" colors are among the easiest to start with to enhance your color. Most use a very low 3% peroxide to activate them . Some are capable of lifting or lightening one level. Professionally, Redken SHADES EQ is my favorite, bar none!

Second Rule Of Color - Do Your Homework Before You Color:

What does this mean? It means that you must be perfectly honest to yourself and about yourself and the factors that enter into hair coloring. If you are very dark haired (Level 1) and want to be a level 10 platinum blonde, forget home hair coloring!


Step #1: Select The Designed Color That You Want:

First you must select the desired color that you want to be, say an medium warm blonde level 8.

Now that you have determined where you want to be color wise, you have to find out where you are now. By "now" I mean first the 'level' (there's that level word again) and the tone of your hair, whether it has reddish or blonde undertones considered "warm" colors or ashen "cool" undertones.


Lets say that you are a light ash brown level 6. Being a level 6 "ash" light brown means that you have an "absence of 'warm' undertones" in your hair now; but; you want to both "lighten and warm up"' the color to the desired level of an 8 warm blonde color.

Doing The Math For Haircoloring:

Don't panic when I say reddish or blonde undertones. Remember, I said that the color you "see" is a combination of colors reflecting off of the hair. Now you must do the math part of the 'homework'.

You must use a swatch book or ring to compare your hair color as it is now to match levels and tones in natural light if at all possible. Not what you perceive, or think, or what your Aunt Flo called your color when you were a kid!!

Now that you know where you are now and where you are going, let's look at the following example of how to get there!

Desired color-Warm Blonde Level = Level 8
Target color level X 2 = 16
Natural color-Light Ash Brown = Level 6
subtract this from target color level of 16 16-6=10

This gives you the number of levels to lift (= 2) and the level of color to use (=10).

Note: If the total number for the level of color is 13 or larger, pre-lightening is required to achieve the desired color. You need to go off to a professional for double process coloring.

How Hair Is Lightened:

Since it has been established that the 'new' color is a combination of your old color level and tone (referred to as our 'base' color) and the new color that is deposited into the hair, you must take into account what happens when you lighten or lift the base color to another level and deposit the new pigments into the hair shaft.

When hair is lightened it goes through several stages of lightening from the darkest to the lightest from a base of blue in the case of natural black to pale blonde with the palest of yellow as its base color.

This lightening process fractures the color pigment creating undertones that are unwanted.

Always Do A Strand Test:

A strand test is the only reliable way to "preview" the new color. At this time adjustments can be made to the hair color formula to either add or subtract colors to enhance or cancel different undertones in the test strands.

Do not be afraid of doing more than one test strand before doing overall color and always do it on uncolored hair.

The length of time that the color mixture is left on can also be varied to change results. Always thoroughly dry the test strand to check for proper color and breakage/damage.

Warning: Do not attempt to color hair that has had henna or metallic dyes used on it

Tips Before Coloring:

Before coloring it is best to practice parting off thin parts of hair 1/4 to 1/2 inch in width depending on the density of the hair. Apply conditioner to your hair a few days before doing the actual coloring to get the hang of handling a hair color applicator bottle.

In the case of thick long hair, get a friend to help. A clarifying treatment to remove buildup in the hair should always be done before coloring. Always follow the manufacturer's instructions.

On long hair, the ends are always more porous than the rest. Apply color to the mid lengths from about 1 inch from the scalp and then the ends.

Follow this procedure because the scalp will process faster due to the heat of the body and the insulating effect of long hair on the scalp. Here there is no help like experience.

Even just doing the test strands or working on your friends will teach an amateur colorist a lot.....if you will be observant and patient.

Very thick, long hair, may have to be colored in sections, rinsed and the uncolored hair dried to allow color to be applied to the rest.

Be sure not to re-color already colored hair and observe timing exactly.

Tuesday, October 12, 2010

Pakistani fashion trends


Like others, Pakistani Fashion Trends helps the Fashion lovers of the country about what to carry these days and what not. Fashion Central guides you by informing the latest Fashion Trends in Pakistan; as it’s good to explore Pakistan with Pakistani Trends as well. Here, you can come to know about Latest Fashion Trends, Seasonal Fashion Trends, Fashion trends for winter, and Summer fashion trends etc.

Saturday, October 2, 2010

fashion makes prominent your personality


summer collection


Monday, September 13, 2010

Eid Collection

Special Eid Collection

Eid is just around the corner and you’re wondering what to wear for Eid this year – Saree, Salwar Kameez, Anarkali Suit or Lehenga Choli?? One look at Homeindia’s latest collection of Long Choli Lehengas and it wouldn’t take long to settle for a gorgeous Lehenga Choli this Eid.


When it comes to Eid outfits, apart from being amazingly gorgeous, modesty ranks high in order to conform to the conventional style of dressing by Muslim women. While Lehengas are typically paired with short, cropped Cholis baring the midriff, Homeindia’s latest Lehenga Choli collection includes gorgeous Lehengas paired with modest long Cholis. The Long Choli Lehenga Collection features Lehengas with waist-length Cholis or a hip length Cholis. Readymade Long Choli Lehengas feature Cholis with fixed length and hence it would be difficult to alter the length of the Cholis. Therefore, it is important to check the length of the Choli before buying the Lehenga Choli. On the contrary, when it comes to custom-made Lehenga Cholis, you can mention the required length of the Choli while placing an order so that it can be made accordingly by the dressmakers.

Lehnga cholislook great almost on every body type thanks to its flattering flowy silhouette. Ornately embellished Lehenga Cholis in deep and enriching shades make the perfect Eid Outfits for women. However, not every type of Lehenga Choli is meant for every woman. Choosing the right kind of Lehenga Choli depending upon one’s body type makes a lot of difference and could end up making you look fab or drab this Eid. It’s best for shorter women or women on the plump side to opt for a monochromatic Lehenga Choli in deep shades of greens, blues, reds, pinks, etc. The use of a single shade has a slimming effect and tends to make a woman look taller. To break the monotony of a single shade, opting for a Lehenga Choli teamed with a contrast colored Dupatta would be perfect. It looks striking and yet flatters such body types.


leather handbags


Since the early days woman have been using handbags as a fashion statement. From the early days to the present day the handbag is still a fashion icon, and over time the styles have changed but carrying a handbag still means class and fashion. With so many handbags each having its own personality it is impossible to every get bored. Some look very basic and others very elegant and luxurious, some are made with luxurious materials and designs and others with simple but beautiful designs.

Fashion handbags come in different shapes and styles such as The HOBO, Satchel, and Tote bag. With all these shapes and sizes you are sure to find the one that suits you best, whether it be a celebrity fashion handbag or a tote bag. Fashion bags come in a variety of sizes so you are able to put what you need in your bag or even just carry it around for that great new look.
When searching for a fashion handbag you must ask yourself what you want this bag to do for you, and how much are you willing to spend? If you don't want to leave the comfort of your home then you can always find great handbags online. With this variety of handbag retailers online you are sure to find what you like.

Online you can find exactly what you're looking for. This fashion handbag sites are designed so the customer can find what they wanted easily. The bags are designed by color, size, and brand. Some of the colors available include brown, black, pink, white, green, blue and many others. Also they have a wide selection of celebrity bags, leather bags, and beaded bags; with such a great variety you are sure to find what suits you best.

You don't have to live in the United States to buy fabulous handbags. With the Internet you have access to fashion companies from around the world. These hand crafted, high quality bags are made from name brand designers in dozens of countries. The bags are designed with the customer in mind so you are sure to find a great bag for your personality. You can be in the comfort of your home and do all your shopping you want.

Most online retailers have a wide selection so you are able to search for your bag with an easy search options. Many sites include a search by designer option, search by color, or search by style of handbag. Online handbag stores are top quality and offer a variety of great styles. You are sure to find what is in style and what fits your personal style best. If you don't know what style you like, you can spend hours browsing all the great looks available at online handbag stores

leather handbags


are different methods for constructing leather handbags the same as there are for houses. There is the log house, the A frame, the frame house. They can have different windows, foundations, dormers etc. The same is true of handbag construction. Take a look at some of my leather handbag styles.


The first step in making a leather handbag is to find a picture of a handbag you like, or draw a picture of something you want. You then need to decide what methods you will use in it's construction. There
After you know the different types of handbag construction you can combine methods to get the result you want. It is important that you think about the construction step by step so that you can do the necessary operation while you have access to the part. You can't sew a pocket into the lining after the bag is complete. You have to do the operation when it will fit into the sewing machine.

When someone asks me to make them a custom leather handbag I decide on the construction method from experience. If they want additional features I may have to modify the method or change to another method. For instance, there are a lot of ways to make the bottom of a leather handbag. Will the seams be on the center of the ends or on the corners. If the seams are on the corners, an end pouch can be sewn onto the end before the leather bag is assembled. If the seam is on the center of the end as on the leather handbag we are about to make, the pouch would have to be sewn on after assembly when that seam has been sewn. This is more difficult. The more difficult you make the bag to assemble the more likely you are to sew something crooked, wrong or through another part of the bag. When doing jacket repairs it's what I call. "sewing your elbow to your knee".

Saturday, August 14, 2010

HIGH HEELS


It’s been fairly universally acknowledged that the shoe is the new must-have fashion item. Now that Hilary Alexander has declared it so, it’s official!

But not just any shoe, the so-called “killer heel” at heights of four, five, even six inches and bolstered by towering platforms and selling for more than $2,000 on average. For spring 09 these shoes are piled high with adornments, like the Louis Vuitton “Spicy” sandal collection seen above. Rare and exotic leathers, tribal-inspired fringe, beads, sequins, rivets and almost anything else you can imagine on a shoe has been piled on to these few pairs. Victoria Beckham and Madonna have both been seen in the collection.

Tuesday, August 10, 2010

how to control your face from face control


According to Max Factor's chief make-up artist, Jan Thomas, contouring and highlighting your face can bring out your cheek bones, shorten your nose, slim your face and rid you of a double chin. Here's how to do it ...
1. "Think of your face as a canvas," explains Thomas. Once you've applied foundation to even out your complexion you need to shade and highlight areas to create shape. Think of the principles of light and dark — any areas made darker will appear as though they're receding, and anything made lighter appear as though it's coming forward.

2. "I think the easiest product to use is a bronzing powder without too much shimmer," explains Thomas. Always start with a little on your brush and build it up gradually.
3. Begin by building your cheek bones. To do this, add a little bronzer below your cheek bone, from the hairline to towards the apples of your cheek, in a wedge-like shape. This trick is especially good for women who have very round faces. "[Contouring is] all about reshaping your face and giving it sharper edges — you can never have too-high cheek bones," says Thomas.

4. To make a wide or very round forehead appear narrower, shade just the temples or sides of the forehead, and to slim a wide nose, apply the bronzer down the sides of your nose. Want your nose to appear shorter? Shade the underside of the tip.

5. Disguise a double chin by shading the area under your jaw line. Blending is key in contouring your face — the idea is that you can't see where the contouring starts and stops.
If you don't have deep-set eyes (ie lids that are still visible when your eyes are open), make them pop by shading along the crease line. Do this either with the bronzer or an eyeshadow that's a shade darker than the colour you'll wear.

7. To bring areas of your face forward, thus emphasising them, do the opposite to contouring and use a highlighter (most likely a shimmery powder a bit lighter than your skin colour). The areas you want to do this to are your new-found cheek bones, and the centre of your eyelids. When it comes to your lips, dab a lighter lip shade or illuminating cream just in the middle of them.

Contouring and highlighting your face can take a little practice, but as Thomas says, "Once you start, you'll want to do it every day." His tip: try it next time you have a big event coming up and take note of how you look in photos taken on the day. "People in film, TV and pictures can't live without [this trick]."

NB: You don't have to use a bronzer and highlighter to do this make-up trick — darker and lighter foundations can be used as well.

Thursday, July 1, 2010

MAKE YOUR WISHES COME TRUE


Oriflame is today one of the fastest growing beauty companies selling direct. We are present in 62 countries, of which we are the market leader in more than half. We offer a wide range of high-quality beauty products as well as a unique opportunity to join our sales force and start your own business.
IF U WANT THEN CONTACT: 03224234285

Sunday, June 20, 2010

smoky eyes with make up

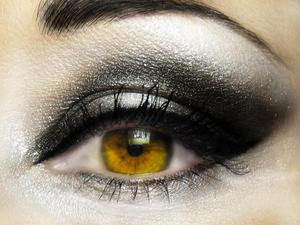
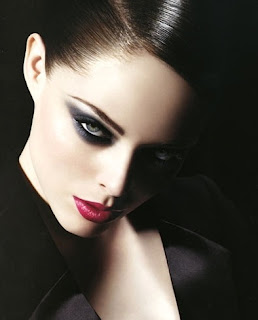
Simply follow the 7 easy steps below and before you know it, you’ll be rocking the gorgeous Smoky Eye Look yourself!


Step 1 – Getting Your Eyes Ready

Begin by applying a light shade of concealer to the under eye area, and all over the top lid. Your mineral makeup foundation is a great concealer for this step and prepares your Eyes for the eyeshadow that you are going to apply.

Step 2 – Using the Liner

First, line both the top and bottom rims with an eye pencil, paying close attention to going into the lash line itself.
If you have small eyes apply liner starting from the middle of the under eye to the outside of the eye. If your eyes are large feel free to line from corner to corner.
Hint: If you are using liquid liner you can place dots on the lash line and then follow the dots to get a perfectly straight line. I knew those connect the dot puzzles I did as a kid would come in handy some day!

Step 3 – Adding the Shadow

With a small eye shadow brush or a q-tip, soften the edges of the eye pencil line.
Apply a dark shadow using a sponge-tip applicator, smudge brush or a q-tip directly over the penciled area and smudge. (If you prefer, you can use your finger tip.)
The shadow helps to set and soften the look.

Step 4 - The Final Touch

Next apply a lighter shadow in a neutral tone with a larger eye shadow brush, I like to use the wet/dry brush.
Encircling the entire eye area, be sure to soften and graduate outward for that perfect blended look.
Add Mascara!
In case you haven’t found your perfect mascara yet, you will love this post on best mascaras, called Best Mascaras – Expert Reviews. I was doing a research to finally find the mascara that worked for me and it turned into a nice post on the best mascaras out there. But back to the Smoky Eye…

Step 5 – Cleaning up The “Territory”

Brush away any shadow that has fallen below the eye with a fluffy brush and clean up any areas that have smeared with a q-tip.
Step 6 - Going Super-Dramatic
Want a more dramatic look add more Shadow and Mascara! If you are looking for the most dramatic effect be sure to curl those lashes and apply 2-3 coats of black mascara!
Hint: Want your eyes to look larger – Pull your liner upward when lining your bottom lashes instead of out from the top liner! This will make your eyes look larger and rounder!


Step 7 – Finishing up The Lips

If you want to go for a classic smoky eye look, lightly line lips with a natural color and add some sheer color in peach, caramel, or barely there pink.
You might try the Nude look on the lips with your smoky eyes – see these 5 Tips on Embracing The Nude Lip Look to learn more…
If you want to add more drama to your look, line your lips with a darker lipliner and fill it in with a deep color to get that look from YSL, Dior and Armani beauty ads.
Both, the nude lip and the deep dark pout are very “it” this season. So, it’s up to you to decide which look is better for you.
And the last, but not least, don’t forget to put some natural looking blush on your cheeks. It will ad some color to your complexion.
Voila! You’ve got the look!

Wednesday, June 16, 2010

glossy eye shadows

Our Pressed Bare Mineral Matte Eyeshadows are Hypoallergenic, Talc Free, Fragrance Free and Oil Free. These Earthly Micro Minerals that are Infused with Conditioning and Protective Vitamins that the delicate eye area needs.
These Intense Eyeshadows Glide on Flawlessly and Last for Hours without Settling into Fine Lines, Creasing or Smudging. as each pigment is specially treated for extended wear. These Specialty Eyeshadows are part of our Professional Studio Collection and we use them on all major photo and television shoots. These Ultra Modern Matte Eyeshadows are Specially Formulated not to look cakey when applied and they make your eyes look less tired, less lined, less wrinkled and years younger.

matte eyeshadow

Electric Eel eyeshadow is a bright pop of blue. It’s a matte eyeshadow, but it’s smoother than most matte finishes. It is also ridiculously pigmented! If you find the texture too difficult, try Clarity eyeshadow instead, which is similar, but has a Matte2 texture, which is smoother and has a more buttery feel.

Freshwater eyeshadow is the perfect medium blue. It’s not light, but it also isn’t too dark. It has a veluxe pearl finish, which means it has shimmer in its texture, but it looks gorgeous because it is so richly pigmented.

Prussian eyeshadow is a dusty dark blue, and it has a matte finish (it is a Matte2 by definition). It’s smooth without being chalky, and it can add so much dimension to your look (as mattes often do).
Deep Truth eyeshadow is a rich dark navy blue with a frost finish, so it does have a good bit of shimmer in it. It can be used in blue, green, and teal looks. It also makes an amazing smokey eye when used with blues, grays, or silvers. This shade also has great pigmentation.

Plumage eyeshadow is a gorgeous shade of dark teal-blue with a matte finish. It’s an absolute must, because it offers a shade of blue that’s muted by a bit of teal, and yet it isn’t a teal.

Tilt eyeshadow is a shimmery periwinkle blue with reflection of green. Since it has so many characteristics, it can be very versatile when used in looks.
Passionate eyeshadow is a matte, bright red-pink. It’s not a true red, and it’s not a hot pink-it’s somewhere in between. It’s not always the easiest color to wear, and I definitely don’t think necessarily *everyone* should have it, but it’s a nice pop of color for anyone who will actually wear it!

Da Bling eyeshadow is a smooth, blendable medium warm-toned pink with gold shimmer. A lot of pinks tend to be cool or neutral, so it’s great to have one with a warm undertone (especially for those who have warmer complexions).

Expensive Pink eyeshadow is a peachy-pink that really makes pink way more wearable than you think. If you’re a little wary of hot pinks, bright pinks, and baby pinks-consider Expensive Pink. It has only a little bit of pink; I’d almost describe it as a dirty pink.

Hush eyeshadow is a sheer, shimmery highlighter with just a hint of pink. Hush makes a great all-over lid color in neutral looks, but it is a great way to highlight the brow bone when you are also wearing pink or purple eyeshadows. The touch of pink helps tie everything together.

Swish eyeshadow is a deeper fuchsia pink, which runs darker and has more dimension than a really bright fuchsia. It runs more fuchsia-purple than straight pink, but it can always be brightened by layering with a bright pink base, too.

Thursday, June 10, 2010

Liquid eyeliner

Liquid eyeliner should only be used above the top lashes. It is best to use a pencil or eyeshadow under the lower lashes. For a more dramatic look, use a colored kohl pencil above and below lashes and follow with a black liquid liner on the top. It will make your lashes appear darker and will stay on all day. A dark eye-liner highlights the shape of your eyes and deepens the look. Softly line with eyeliner pencil, draw a thin line along lashes next to roots.

For a dramatic look, lightly dot color along the lower lashes. For softness, line can be smudged with fingertip or Q-tip.

Eyeliner should be applied close to the base of the eyelashes. Products vary from cake to liquid liner to pencil. Practice makes perfect in achieving a fine line. Hold your head back and look down into the mirror. The eyelid will be tight and it will be easier to apply the liner. Smudge if necessary.

Don´t apply eyeliner in a thick line. It looks harsh and makes the eye appear heavy and tired. Get out of the 60´s and instead use a fine line. If you have trouble, use a brush to blend and smooth it out.

By using a line under the lower lashes gives the illusion of making the eyes appear larger. Instead of using a pencil, try using a small makeup brush with a dark eyeshadow. Apply into the lashes to make the lashes appear darker. Below this line apply a highlighter eyeshadow (in white, beige or yellow) in a fine line with a cleansed small brush. This will brighten the eye area.

There are pencil eyeliners, liquid eyeliner, and cake eyeliners. Pencil liners can be used above top lashes and under lower lashes. Liquid liners should only be used on the top lid. Cake eyeliners are used with water and can be used both top and bottom.

A smoky violet pencil looks best for someone with green eyes. On the color wheel, green and violet are opposite, and so they look well together. Also, look at nature when deciding on a color palette. Green, burnt orange and beige can be found in a field of autumn colors.

If you want to use the same liner pencil for eyes and lips I would recommend using an eyeliner pencil. Then you know this is safe for the eyes. Choose a shade that is a red-brown or a plum-brown. Then it will compliment your lipstick.

A liquid eyeliner or a cake eyeliner that you use with a fine brush will stay on the best. If you don´t feel adept at using these, pencils work well also. Pencils can be smudged for a subtle look. Always hold your head back, look down into the mirror, and apply your eyeliner. This will keep your eyelid skin tight and you can make a smooth line.

A typical way to apply liquid eyeliner is to line eye from the inside of the lashes outward in one big sweep. You can also line the eye from the middle of the lash line outward, then finish the line from the inner corner of the eye to the middle.
Another liquid eyeliner trick requires a steady hand and will make eyes appear wider.

Step 1: Start with a completely bare eye.
Step 2: Starting with the upper lashes, dot the liquid liner into the spaces between the lashes, wiggling the liner into the lashes. The result is not supposed to be a line. It's supposed to look as if the lashes themselves are super thick at the root.
Step 3: Apply mascara.

The Basic "I'm Off to Work or the Weekend," Eye

This is the perfect work or weekend look for women who want their eyes to "pop" without giving off the appearance of a woman who's really, really into makeup, so into makeup she has this site bookmarked in her Web favorites.
The key to the basic eye is to apply with a light hand. The basic eye is all about appearing natural so consider a deep brown liner if you have light hair.


USE OF EYELINER

Step 1: Holding the skin of your upper lid taut, trace the upper lashes from the inside of the eye with a pencil or an eyeliner brush dipped in a dark eyeshadow. For a more dramatic look, make the outside line a bit thicker than the inside and extend it just beyond the lash line. Another shape I love is dubbed the "Nike swoosh" by Lucky Magazine -- narrow at inner corners, thicker in the middle and swept up a bit at the outer edge.
Step 2: Once the line is set, trace over it with a liquid liner. Hand unsteady? Keep your elbow on a table.

Step 3: Set liner with an eyeshadow.

Step 4: Apply eyeshadow or an eye pencil to lower lashes.

Step 1: Holding the skin of your upper lid taut, apply eyeliner from the inside corner of the eye outward. Draw strokes into the lash line. The middle of the line should be a bit thicker than the edges.

Step 2: Use a cotton swap (or your finger, if you're lazy like me) to "smudge" the liner.

Step 3: Dab an eyeshadow brush into a deep-hued eyeshadow and apply over the eyeliner to set the line. (Blow on the brush first to remove any excess shadow). Layering liner with a shadow is the secret to a perfect smoky eye.

Step 4: Blend shadow well, then follow with eyeshadow. According to the March 2006 issue of InStyle Magazine, with a smoky eye, "color should diffuse from rich and dark near the lashes to almost sheer as it extends to the crease."

The Bold, Dramatic Eye

Bold eyes are a dramatic choice for evening. Try eyeliner shades other than deep black for a super cool look. You can use either a liquid liner or try the makeup artist's trick and use an angled eyeshadow brush dipped in a deep-hued eyeshadow. Skip the pencil for this look.
Step 1: Holding the skin of your upper lid taut, apply the liquid liner from the middle of the eye to the outside corner of the eye.

Step 2: Draw a second line from the inside corner of your eye, letting the two lines meet. The outer edge of the line should be thicker than the inside. If you have close-set eyes, avoid taking the line all the way to the inside corner.


EYE LINER (CAT EYE)

The Cat Eye

Forget the advice you may have read in the past never to line the inside rims of eyes because it makes eyes look tiny. Sexy cat eyes are a cool look for night. The key to this look is to apply a thin line to the inside rims of the lids. Make sure to sharpen the pencil after lining.
Step 1: Holding the skin of your upper lid taut, dot liquid liner along the upper lash line as close to the eye as possible. Apply line from corner to corner of eye, extending the line upward at the outer corner of eye. Let liner dry for a few minutes before touching.

To soften this look (black liquid liner can be harsh), InStyle Magazine suggests trying a smudgeable pencil in a lighter color like dark brown or charcoal.

Step 1: Hold down the lower lid and apply liner only to the outer three quarters of the rim. Fade out the line as you approach the tear duct, according to makeup artist Mally Roncal in the March 2006 edition of InStyle Magazine. Extend the liner upwards at the outer corners.

Step 2: Hold down the lower lid and apply liner only to the outer three quarters of the rim. Fade out the line as you approach the tear duct, according to makeup artist Mally Roncal in the March 2006 edition of InStyle Magazine. Extend the liner upwards at the outer corners.

For a softer version of this look, use an eye shadow brush and sweep a taupe or brown color on the lower lash line.

Sunday, June 6, 2010

Eye Make up


Prep your eyes with concealer Concealer can be used to cover up undereye circles or just the bluish discoloration just under your inner eye. To cover dark undereye circles, apply three dots of concealer under each eye. Start at the inner corner where skin tends to be darkest, then under the pupil and the third on the outer edge. Pat, never rub with your ring finger (this finger tends to have the softest pad) until it disappears.

Apply eye base to your lid eye based is the secret to keeping your shadow in place for hours. Without properly priming your lid first, your eyeshadow will likely end up a greasy line in your crease.

Apply shadow. It's great to use a three-toned shadow and build from lids to brow. Allowing them to blend into each other like a rainbow is gorgeous, according to celebrity makeup artist Mally Roncal. Start with a light color that almost matches your lid. Sweep the color across the lid and up to your browbone. Follow with a medium color across your lid only. Build on this with a darker color in the crease. Blend the colors well.
Follow with eyeliner Dark eyeshadows work great as eyeliners. Wet a slanted brush, then dip in a dark eyeshadow. Line eyes as close to the upper lashes as possible from the inner corner to the outer corner. Follow with liner on bottom eyes, but only line from the middle of the eye out. Smudge the bottom line with a Q-tip or your finger. You don't want a prominent line. For a smokey eye, use a brush to pat in a dark eyeshadow along the upper lid and below the lid. You don't want a stark line, instead you want to blend it so it's 'smudge-y.'

Brighten your eyes with a highlighter This step involves only the inside part of the eye. With a gold or pink highlighter (white is too bright), draw a v-shaped shape that follows the inner corner of your eye from top to bottom. Blend with your fingers. This will help make eyes 'pop.'
Highlight your brow Take the same highlighter and dab it on your browbone, concentrating on your mid-brow outward. Blend with your finger.
Curl lashes An eyelash curler will make even long lashes look more gorgeous. For added effect, you can heat the curler under a blowdryer for a couple seconds. Test curler before applying to lashes because you could burn yourself.
Apply mascara Place the wand of your mascara brush at the bottom of lashes and wiggle back and forth. Follow with another few sweeps of the wand. Apply to bottom lashes as well.

Friday, June 4, 2010

Eye Make up

Advanced Rounded Eye Shadows Application


1 Highlighter eye shadow across the eyelid, from the lash line to slightly beyond the crease, and all the way to the eyebrow.

2 Mid tone eye shadow on inner corner of lid.

3 Accent eye shadow on crease and in wedge; blend all well.

4 Line upper and lower lashes with with eyeliner pencil.

Eye Make up

advanced Rounded Eye shadow Application.


1 Highlighter eye shadow across the eyelid, from the lash line to slightly beyond the crease, and all the way to the eyebrow.

2 Mid tone eye shadow on inner corner of lid.

3 Accent eye shadow on crease and in wedge; blend all well.

4 Line upper and lower lashes with with eyeliner pencil.

Thursday, May 20, 2010

FASHION ALBUM


Tuesday, May 11, 2010

SKIN GLOWING

HOW MADE REMEDIES FOR SKIN GLOWING.

Well people, are you fancy having a glowing skin and a bright complexion? If yes, then we will tell you that how can you make your complexion clean and clear as much as you can while staying at your home.
First of all, we tell you sugar mask with lemon peels. Take equal proportions of grained sugar and powered lemon peel, mix them with a bit of milk and make a fine paste, apply it on your face and when it dries wash off with fresh water. If you apply it at least once in a week, it not only smoothes your skin but also adds shine and brightens your complexion.

LEMON AND SKIN CARE


LEMON Is MUST B IMPORTANT FOR SKIN CARE.

Is your complexion dull and tired? Have dark spots on your skin that you want to lighten? Follow these steps to naturally and safely lighten your skin with lemon.