Tuesday, August 10, 2010

how to control your face from face control


According to Max Factor's chief make-up artist, Jan Thomas, contouring and highlighting your face can bring out your cheek bones, shorten your nose, slim your face and rid you of a double chin. Here's how to do it ...
1. "Think of your face as a canvas," explains Thomas. Once you've applied foundation to even out your complexion you need to shade and highlight areas to create shape. Think of the principles of light and dark — any areas made darker will appear as though they're receding, and anything made lighter appear as though it's coming forward.

2. "I think the easiest product to use is a bronzing powder without too much shimmer," explains Thomas. Always start with a little on your brush and build it up gradually.
3. Begin by building your cheek bones. To do this, add a little bronzer below your cheek bone, from the hairline to towards the apples of your cheek, in a wedge-like shape. This trick is especially good for women who have very round faces. "[Contouring is] all about reshaping your face and giving it sharper edges — you can never have too-high cheek bones," says Thomas.

4. To make a wide or very round forehead appear narrower, shade just the temples or sides of the forehead, and to slim a wide nose, apply the bronzer down the sides of your nose. Want your nose to appear shorter? Shade the underside of the tip.

5. Disguise a double chin by shading the area under your jaw line. Blending is key in contouring your face — the idea is that you can't see where the contouring starts and stops.
If you don't have deep-set eyes (ie lids that are still visible when your eyes are open), make them pop by shading along the crease line. Do this either with the bronzer or an eyeshadow that's a shade darker than the colour you'll wear.

7. To bring areas of your face forward, thus emphasising them, do the opposite to contouring and use a highlighter (most likely a shimmery powder a bit lighter than your skin colour). The areas you want to do this to are your new-found cheek bones, and the centre of your eyelids. When it comes to your lips, dab a lighter lip shade or illuminating cream just in the middle of them.

Contouring and highlighting your face can take a little practice, but as Thomas says, "Once you start, you'll want to do it every day." His tip: try it next time you have a big event coming up and take note of how you look in photos taken on the day. "People in film, TV and pictures can't live without [this trick]."

NB: You don't have to use a bronzer and highlighter to do this make-up trick — darker and lighter foundations can be used as well.

Thursday, July 1, 2010

MAKE YOUR WISHES COME TRUE


Oriflame is today one of the fastest growing beauty companies selling direct. We are present in 62 countries, of which we are the market leader in more than half. We offer a wide range of high-quality beauty products as well as a unique opportunity to join our sales force and start your own business.
IF U WANT THEN CONTACT: 03224234285

Sunday, June 20, 2010

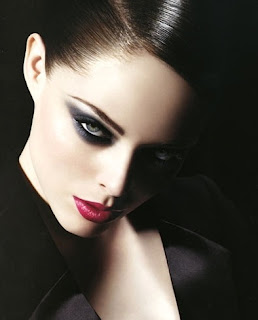
smoky eyes with make up

Simply follow the 7 easy steps below and before you know it, you’ll be rocking the gorgeous Smoky Eye Look yourself!


Step 1 – Getting Your Eyes Ready

Begin by applying a light shade of concealer to the under eye area, and all over the top lid. Your mineral makeup foundation is a great concealer for this step and prepares your Eyes for the eyeshadow that you are going to apply.

Step 2 – Using the Liner

First, line both the top and bottom rims with an eye pencil, paying close attention to going into the lash line itself.
If you have small eyes apply liner starting from the middle of the under eye to the outside of the eye. If your eyes are large feel free to line from corner to corner.
Hint: If you are using liquid liner you can place dots on the lash line and then follow the dots to get a perfectly straight line. I knew those connect the dot puzzles I did as a kid would come in handy some day!

Step 3 – Adding the Shadow

With a small eye shadow brush or a q-tip, soften the edges of the eye pencil line.
Apply a dark shadow using a sponge-tip applicator, smudge brush or a q-tip directly over the penciled area and smudge. (If you prefer, you can use your finger tip.)
The shadow helps to set and soften the look.

Step 4 - The Final Touch

Next apply a lighter shadow in a neutral tone with a larger eye shadow brush, I like to use the wet/dry brush.
Encircling the entire eye area, be sure to soften and graduate outward for that perfect blended look.
Add Mascara!
In case you haven’t found your perfect mascara yet, you will love this post on best mascaras, called Best Mascaras – Expert Reviews. I was doing a research to finally find the mascara that worked for me and it turned into a nice post on the best mascaras out there. But back to the Smoky Eye…

Step 5 – Cleaning up The “Territory”

Brush away any shadow that has fallen below the eye with a fluffy brush and clean up any areas that have smeared with a q-tip.
Step 6 - Going Super-Dramatic
Want a more dramatic look add more Shadow and Mascara! If you are looking for the most dramatic effect be sure to curl those lashes and apply 2-3 coats of black mascara!
Hint: Want your eyes to look larger – Pull your liner upward when lining your bottom lashes instead of out from the top liner! This will make your eyes look larger and rounder!


Step 7 – Finishing up The Lips

If you want to go for a classic smoky eye look, lightly line lips with a natural color and add some sheer color in peach, caramel, or barely there pink.
You might try the Nude look on the lips with your smoky eyes – see these 5 Tips on Embracing The Nude Lip Look to learn more…
If you want to add more drama to your look, line your lips with a darker lipliner and fill it in with a deep color to get that look from YSL, Dior and Armani beauty ads.
Both, the nude lip and the deep dark pout are very “it” this season. So, it’s up to you to decide which look is better for you.
And the last, but not least, don’t forget to put some natural looking blush on your cheeks. It will ad some color to your complexion.
Voila! You’ve got the look!

Wednesday, June 16, 2010

glossy eye shadows

Our Pressed Bare Mineral Matte Eyeshadows are Hypoallergenic, Talc Free, Fragrance Free and Oil Free. These Earthly Micro Minerals that are Infused with Conditioning and Protective Vitamins that the delicate eye area needs.
These Intense Eyeshadows Glide on Flawlessly and Last for Hours without Settling into Fine Lines, Creasing or Smudging. as each pigment is specially treated for extended wear. These Specialty Eyeshadows are part of our Professional Studio Collection and we use them on all major photo and television shoots. These Ultra Modern Matte Eyeshadows are Specially Formulated not to look cakey when applied and they make your eyes look less tired, less lined, less wrinkled and years younger.

matte eyeshadow

Electric Eel eyeshadow is a bright pop of blue. It’s a matte eyeshadow, but it’s smoother than most matte finishes. It is also ridiculously pigmented! If you find the texture too difficult, try Clarity eyeshadow instead, which is similar, but has a Matte2 texture, which is smoother and has a more buttery feel.

Freshwater eyeshadow is the perfect medium blue. It’s not light, but it also isn’t too dark. It has a veluxe pearl finish, which means it has shimmer in its texture, but it looks gorgeous because it is so richly pigmented.

Prussian eyeshadow is a dusty dark blue, and it has a matte finish (it is a Matte2 by definition). It’s smooth without being chalky, and it can add so much dimension to your look (as mattes often do).
Deep Truth eyeshadow is a rich dark navy blue with a frost finish, so it does have a good bit of shimmer in it. It can be used in blue, green, and teal looks. It also makes an amazing smokey eye when used with blues, grays, or silvers. This shade also has great pigmentation.

Plumage eyeshadow is a gorgeous shade of dark teal-blue with a matte finish. It’s an absolute must, because it offers a shade of blue that’s muted by a bit of teal, and yet it isn’t a teal.

Tilt eyeshadow is a shimmery periwinkle blue with reflection of green. Since it has so many characteristics, it can be very versatile when used in looks.
Passionate eyeshadow is a matte, bright red-pink. It’s not a true red, and it’s not a hot pink-it’s somewhere in between. It’s not always the easiest color to wear, and I definitely don’t think necessarily *everyone* should have it, but it’s a nice pop of color for anyone who will actually wear it!

Da Bling eyeshadow is a smooth, blendable medium warm-toned pink with gold shimmer. A lot of pinks tend to be cool or neutral, so it’s great to have one with a warm undertone (especially for those who have warmer complexions).

Expensive Pink eyeshadow is a peachy-pink that really makes pink way more wearable than you think. If you’re a little wary of hot pinks, bright pinks, and baby pinks-consider Expensive Pink. It has only a little bit of pink; I’d almost describe it as a dirty pink.

Hush eyeshadow is a sheer, shimmery highlighter with just a hint of pink. Hush makes a great all-over lid color in neutral looks, but it is a great way to highlight the brow bone when you are also wearing pink or purple eyeshadows. The touch of pink helps tie everything together.

Swish eyeshadow is a deeper fuchsia pink, which runs darker and has more dimension than a really bright fuchsia. It runs more fuchsia-purple than straight pink, but it can always be brightened by layering with a bright pink base, too.